Sign Up for Hosting
1. Begin by going to siteground.com and click Start Now.
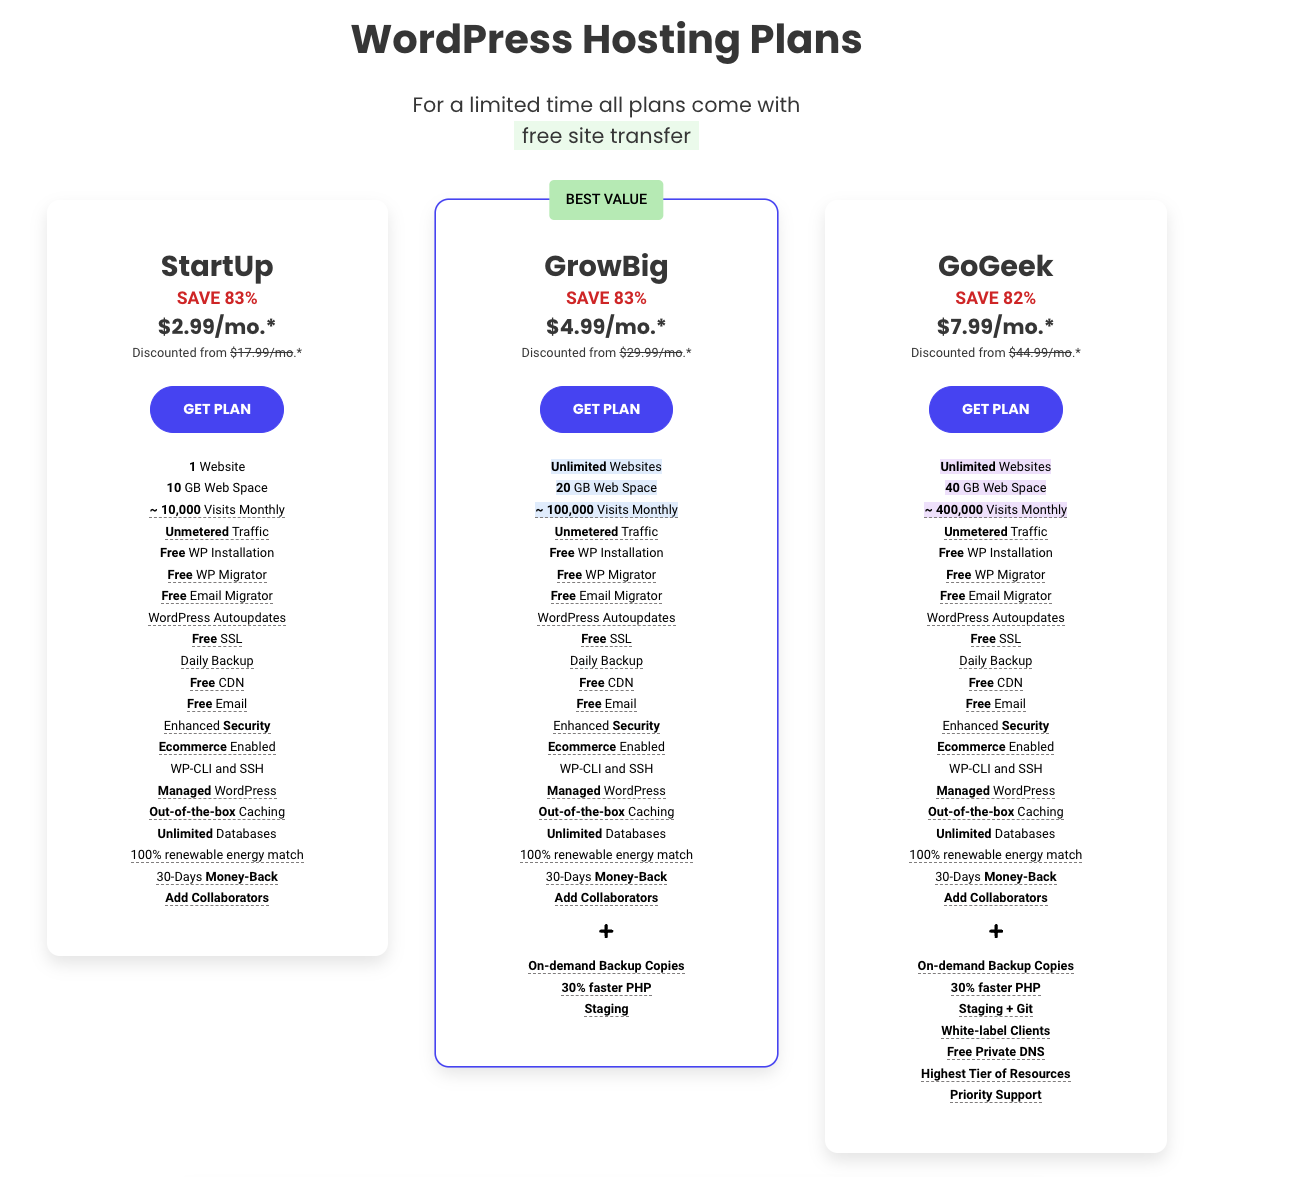
2. Next choose a plan. The “StartUp” plan is generally enough space for a small to medium sized website. If your website is rather large (more than 15 pages), you expect high traffic (more than 10,000 visitors a month), or you plan on hosting more than one site, then I would up to the “GrowBig” plan.
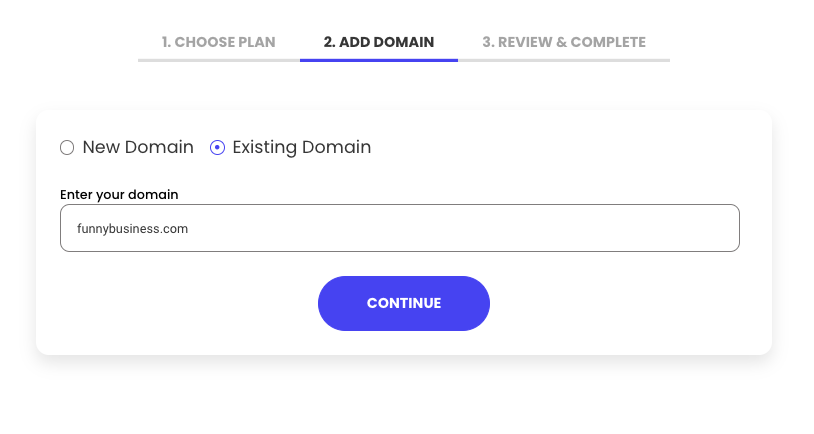
3. Next, add your domain. I recommend purchasing your domain elsewhere (like namecheap.com) as it’s usually less expensive and your domain won’t be tied to SiteGround in the event you switch hosts in the future.
If you have purchased your domain somewhere else, choose the “I already have a domain name” button and enter your domain.
4. On the next page, you’ll set up your Site Ground account and enter your payment information.
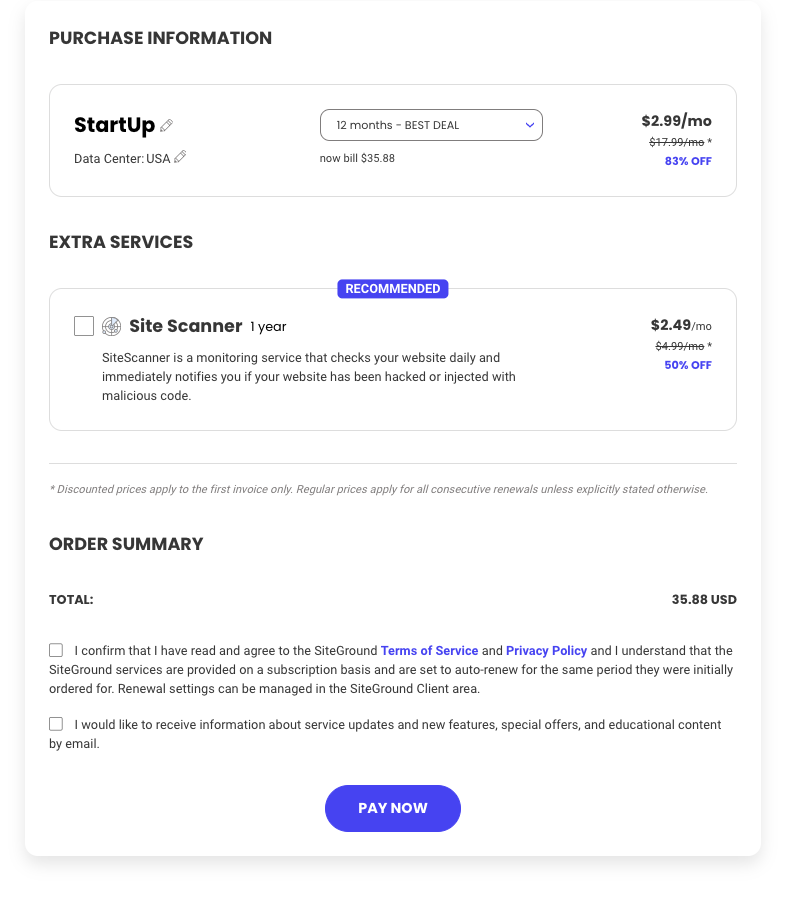
5. Then review your Purchase Information. Keep in mind that although SiteGround lists their prices as a monthly expense, you will be paying upfront for the entirety of your plan. You can choose a longer plan for a cheaper rate. The Site Scanner extra service probably isn’t necessary. If you’re working with a web developer, they should be setting up security measures on their end. If they do recommend using Site Scanner, you can always add that to your account later.
6. Finally, click Pay Now and you’re hosted!
Install Wordpress
If you’re using Wordpress as your website platform, you’ll need to install it onto your site. SiteGround makes this super easy for you. After your purchase is completed, you should be redirected to your Account page.
1. In the top menu choose Websites.
2. You’ll see the domain you just added. Click Site Tools.
3. In the left side menu click WordPress then Install & Manage.
4. Under WordPress click Select.
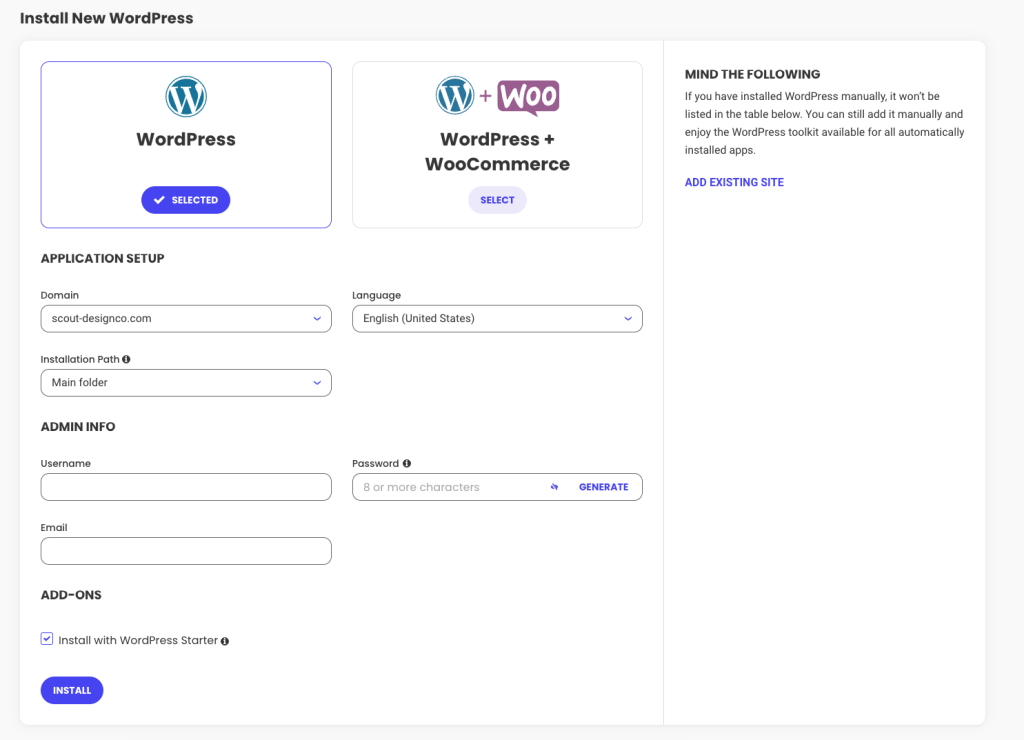
5. Under Application Setup your URL should show under Domain. Keep Installation Path to “Main Folder”.
6. Under Admin Info create a username and password and enter your email. When creating a username and password, remember that you may need to share it with your web designer/developer. Once your project is complete, you’ll be able to change your password.
7. If you’re working with a designer you can un-check Install with WordPress Starter as they will most likely be adding or creating their own theme.
9. Click Install.
10. It may take a few minutes for the installation to complete. Once it’s complete you’ll see an Administrative URL link to access the backend of your new website. In the future you can log in to your site at www.yourdomainname.com/wp-admin.
You’re done!